Materials and Tools for 5 chairs
- 3.5 yards of 45" home decor fabric in the stripe pattern
- 1 yard of 54" clear 12 mil vinyl
- Five 22"x24"x2" chair pads of high density urethane foam
- Staple gun
- Staples
- Scissors
- Philips head screwdriver
- Needle nose pliers

We transitioned Lily from her high chair to a booster right around a year old and immediately discovered what kind of a mess a small child can make while eating. We put a cheap towel between the chair cushion and her booster and washed it once or twice a week, but it still got pretty nasty with spilled food and drink - not a classy look by any stretch of the imagination.


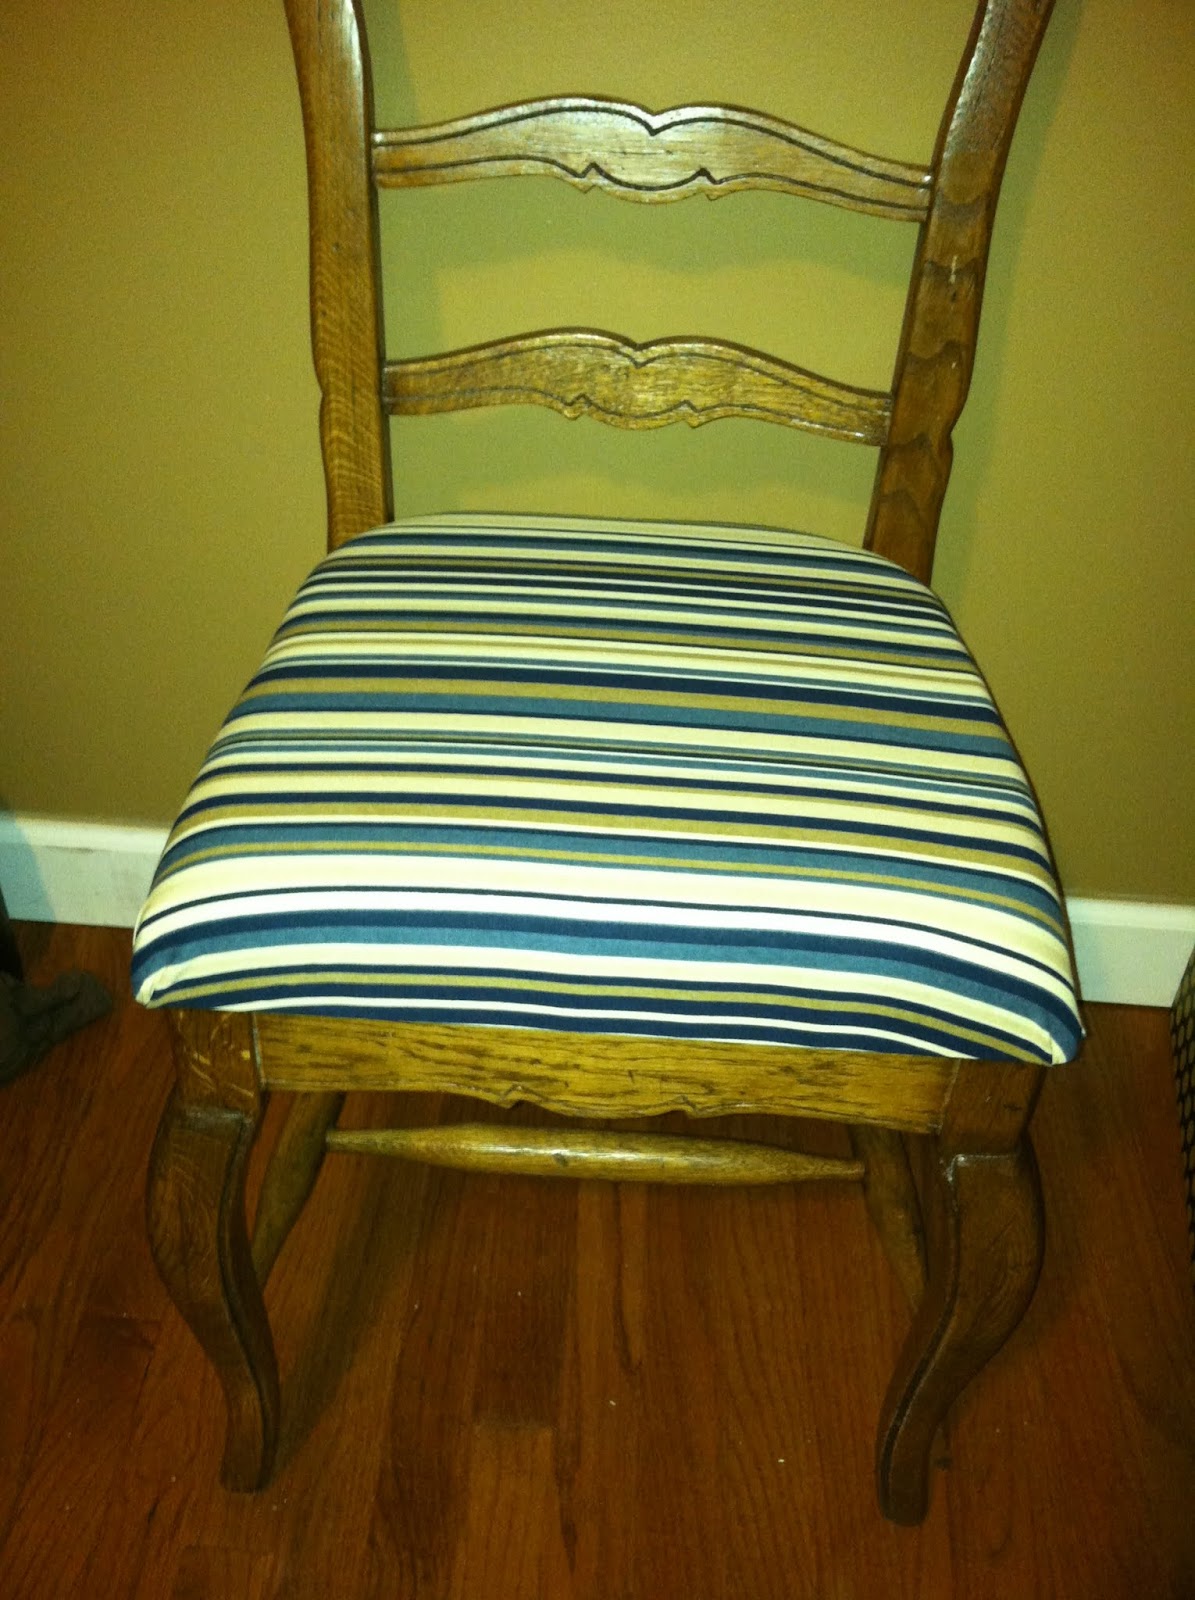
I recently sewed new valences for our dining room windows and decided to re-upholster our chairs to match. I would have just covered over the existing fabric but over 9 years of use the foam is tired and not so springy anymore. I also decided to bite the bullet and cover the upholstery on one of the chairs with clear vinyl. Yeah, it looks kind of like an old lady's clear slipcovers, but with a young child my primary concern is making our everyday life easier, not having perfect aesthetics.
The first step was to remove a cushion from the chair in order to measure for the fabric purchase. The cushion is held on with screws from underneath. My cushions have a thin fabric layer which was stapled over the support webbing. The staples can be pulled with needle nose pliers. I set aside this layer to use again (we're on a budget here, campers). I just measured around with a tape measure and jotted down the dimensions of the fabric; in this case 24"x25". Measure the fabric that's already on your cushions - there's no need to reinvent the wheel here.


Time for math! The home decor fabric that we chose for the valences is a 45" width and we have 5 chairs. 24" x 5 = 120" = 3 1/3 yards of fabric. I rounded up to 3.5 yards to be on the safe side, but unfortunately there will be quite a bit left over since I can only get one piece out of the width of fabric. The 12 mil clear vinyl is a 54" wide, so one yard will be enough to comfortably cover a cushion and have enough left over in case we need to rework it Your numbers may vary from mine. If you're buying your foam-by-the-yard, keep doing the math to figure out how much foam you need; foam seems to come in a 24" width so for my cushions I would have bought 3.5 yards of foam-by-the-yard.
The valences use two fabrics and I considered covering two chairs in the solid blue and three in the stripe.

However this particular home dec fabric is $10.99/yard at regular price, so I really wanted to get all the fabric in one cut in order to use a 40% off coupon on it (I only had one coupon). The stripe also lets me pick up coordinating table linens in the different stripe shades rather than just the solid blue.

However this particular home dec fabric is $10.99/yard at regular price, so I really wanted to get all the fabric in one cut in order to use a 40% off coupon on it (I only had one coupon). The stripe also lets me pick up coordinating table linens in the different stripe shades rather than just the solid blue.
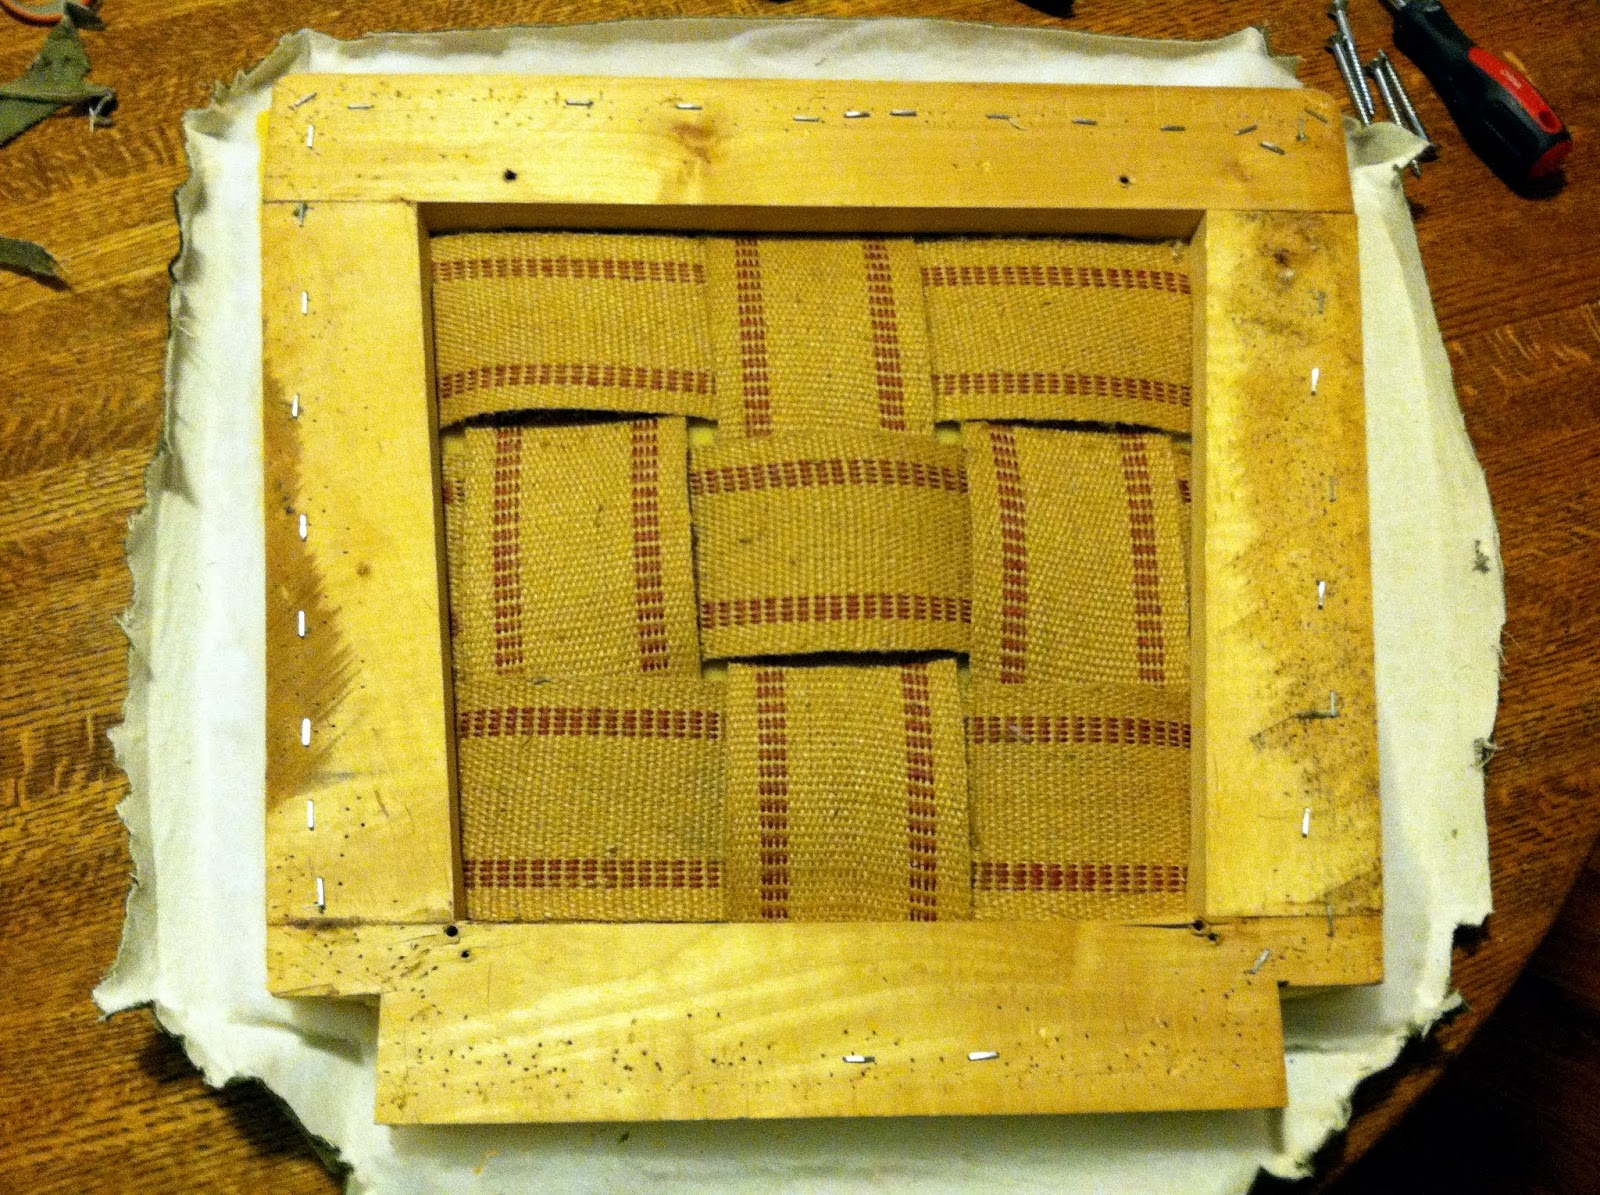
OK, back to the project. We already removed the cushion and took off the thin material to measure for fabric. Now it's time to pry off the staples for the upholstery fabric. The support webbing on the seat base is what actually supports the weight of the person sitting on the chair. The webbing was in good shape on all but one of our chairs and for that chair I just pulled the staples out, pulled the webbing taut, and re-stapled. You want to try to get one piece of the old upholstery fabric off intact to use as a template for the others. Once I got the first piece off, I used a utility knife to cut the fabric on the others and that made the process go much faster than trying to yank all those staples out. Underneath the fabric there were layers of 1" high density foam, thin batting, and the seat base itself.


The first step of reupholstering is to trim down the chair pad to fit. I decided to do away with separate 1" foam and batting and just go with a thicker 2" high density foam. Use the old foam or padding as a template - just trace around and use scissors to cut to the correct shape and size.


The second step is to cut the fabric and vinyl (if you're using it). Again, keep it simple and use the existing fabric as your template.


Then we start stapling. I found it was best to get one side anchored, then pull the fabric taut across and anchor the opposite side. Use staples liberally; I place them every 1.5-2 inches along the full length or width.


At corners you're going to need to ease the fabric a bit. This is really the only fiddly part of the whole process. It was not unlike making hospital corners on a bed or wrapping a gift - you tuck and anchor so that the fabric is even.


Finally I re-stapled that thin black cover fabric over to hide the pad and webbing and give the cushion a neat appearance. I screwed the cushion back onto the chair and it was done!


For Lily's chair I did the exact same thing but then covered with the vinyl piece. It was more challenging to work with vinyl because it doesn't stretch. I covered the cushion in two layers, first stapling the striped fabric and then independently stapling the vinyl - this way if we ever want to remove or need to replace the vinyl we can do it without disrupting the fabric underneath. The vinyl is a little wrinkly but it works. I'm hoping that by the time we're past the stage of having young kids we'll be able to buy a new dining set!

This was an inexpensive and easy way to update our dining room - and the use of the vinyl makes cleanup after Lily so much easier.
No comments:
Post a Comment