Tuesday, July 31, 2012

So when are you going to have another?

Lily will be two on Sunday and it feels like I hear that question constantly.  You wouldn't believe the level of baby fever I often feel.   THREE of the moms in our little playgroup are expecting their second babies in December, the mom of one of Lily's friends at daycare is pregnant, everywhere I go I see pregnant ladies.

We decided pretty early on that we wanted to try to space our kids out, and we really have no choice in the matter due to finances.  With the cost of daycare not dropping until 3 it's primarily an issue of child care costs, but also to ensure that my FMLA and dependent care days would reset so that I can take as much time off of work as possible.    In Connecticut we get 16 weeks of FMLA in a 24 month period, so I wouldn't be able to take more than a 6 week maternity leave until mid-October 2012 (24 months after I went back to work).    So we've waited, and we feel like the wait is close to being over.  

I love being a mom.  Mark and I want so much to see Lily with a little brother or sister, to have another sweet newborn to get to know as a little person, to have our lives be forever changed by our child.  Lily loves babies and will be an amazing big sister.  We got lucky with Lily; we conceived the first time we tried and the pregnancy stuck.   I know so many women who didn't have the same good fortune and I'm very aware that just because it happened that way once doesn't mean it automatically will again.   I don't want to wait when it could take time.    We're not getting any younger (not that we're that old) and we kind of want the kids out of the house at some point before we retire, you know?  

At the same time I'm finally feeling back in the groove at work.  I feel ready to take on more projects, to take some training classes, that it's OK for me to spend 9+ hours at the office if I need to because Lily's having fun at daycare.   It's been around a year since I had to wake up overnight to tend to a fussy child (I know, we're lucky).   She eats the same food we do, using normal plates and utensils; there's no washing of bottles and pump parts and hasn't been for a while.   It's all pretty easy now, and a newborn would mean months or years of less sleep.   

We have a feeling we'll pull the goalie soon-ish and see what happens.   Still, I think we've thought about and analyzed the decision to try for a second baby way more than we analyzed the decision to try for our first baby.   Having your first creates a family, and having more babies changes it - it's not just us who will be affected by a future child, it's Lily too.   

Sunday, July 29, 2012

Time for a big girl bed

We bit the bullet a week ago and converted Lily's crib to a toddler bed.    With around an hour of effort on my part with her parked in front of Sesame Street, we went from this:


To this:


Lily was a little confused at first but quickly climbed in to try it out.   We made a big deal out of her BIG GIRL BED and her exciting new sheets and blanket and pillow for the big girl bed, and she did really well with the transition.   It was almost a week before she fell out and it only happened once (she still moves around the bed a lot, but less than when it was set up as a crib).   Mark and I kept the crib rail in our room just in case we had to do a quick reversion but it seems to be just fine.

We peek in on her every night before we go to bed, and that first night in the toddler bed we looked at each other and thought that she looked so grown up.   And she is - I can't believe how the last two years have flown.

Tuesday, July 24, 2012

Birthday party plans

Yeah, my staycation wasn't quite as fruitful as I had hoped it would be.   Isn't that kind of how it always goes?

Lily's birthday kind of crept up on us this year.  It's funny - last year for her first birthday I was nuts about planning everything to the letter.  We had a theme with expensive custom cupcakes, we had a detailed menu, I did a bunch of crafting (even making artsy signs indicating things like "Pasta Salad" as if someone couldn't freaking see it in the serving dish), I was totally channeling my inner Martha Stewart - and then it went and was in the 60s and pouring down rain the day of the party.   IN AUGUST.  Thanks to a speedy delivery and setup of a large tent from our dear family friends who own a rental center, we managed to salvage the backyard party, but I was incredibly stressed and spent the entire party in a panic over making sure our guests were reasonably comfortable, fed, and dry.    After the guests went home we realized that there were few pictures of us with our daughter at her party, because we were so busy running around like maniacs.

I was tempted to book the local children's museum for Lily's party this year, but we decided to do a more informal party at home.  Our whole approach is much less formal - a smaller guest list, cupcakes ordered from the bakery down the street, burgers & hot dogs on the grill with soda and beer in coolers, a pop-up canopy or two, and the entertainment will be a bunch of kids playing in the water table and kiddie pool (weather permitting).   Because we have the bedroom on our main level set up as the playroom now, if it rains we'll just head inside and the kids can play in there.   Our house is small, but with fewer guests it would be more tolerable if we can't be in the yard.

Now to think of a birthday gift for the 2 year old who has everything...


Sunday, July 22, 2012

Not quite a fashionista...

...but I'm trying!   I've never been one for fashion.   I was never a girl who bought makeup and wore it behind my parents' back.  My hair has never been inspired; much of my teens and 20s was spent with the simplest wash-and-wear option I could find.   And clothes?  Utilitarian at best.   I spent the first several years with my employer working at our test facility often, and there was no point in spending money on expensive clothes when they'd just get grease, rust, and dirt on them.  Plus, I'm close to being plus-size and it can be a bitch to find pretty clothes in a size 16 when everything is cut to fit a size 6.   I can't just run to Nordstrom or Loft and go nuts.

Lately I've been trying some new things.  I'm no spring chicken anymore and I can't rely on youth to get me through.   I really do need to wear makeup to smooth out my skin tone and hide the redness and dark circles under my eyes that have only gotten more obvious with motherhood.   I ought to wear cute clothes that make me feel good, even though no one at work will really care.

My stylist up and quit with no warning back in May and I let my hair go - not a pretty scene.   I found a new salon on the recommendation of a coworker and went for a partial foil and cut.   The colorist had to do not one, but TWO Malibu treatments to get the well water-related mineral buildup out before she did my highlights.   She did an awesome job with my color.   The stylist recommended that we keep some of the length because of my face shape and adding some layers to give my straight-as-a-board hair a little texture and body.   I was OK with that because I can still pull it back for workouts or at work.   And finally, I hit up the Bare Escentuals store at the mall for mineral makeup.  I'm glad I did, because the shade of foundation is not one I would have thought to go for but it really smooths everything out and minimizes the redness of my skin thanks to having yellow undertones rather than pinkish ones.   I'm not doing a whole lot with my wardrobe beyond accessorizing more.  Honestly that's where I've struggled the most - I'm not sure what else to do that won't cost a fortune.

Tuesday, July 17, 2012

Inexpensive wall art

When we got married we inherited a bunch of decor from various relatives, mainly my grandmother.   While there's certainly sentimental value to all of it, much of what we had just wasn't "us" when it came to style.   We've had this needlepoint tray thing hanging on our living room wall for years and decided it was time to update the look a bit:


I got my inspiration from this post at Young House Love.   The scale I was working on was smaller than what they were going for, but fortunately IKEA has smaller Ribba shadowbox frames available.   I snagged three of them for $9.99 each.


Rather than buying colored paper I decided to use fabric scraps; these are left over from a fat quarter bundle that I used to sew another pillowcase dress for Lily.


I just cut the fabric bigger than the opening in the shadowbox mat, then gave them a quick press with the iron.    Then I took the backs off the shadowboxes and centered the hanger in the middle of the backing.


I taped the fabric to the back of the mat and then put the backs on - so simple!


It seriously took me less than 5 minutes to make all three shadowbox frames.


I used our laser level to mark the nail positions on the wall, then hung the frames.   What a great update to our living room decor, all in less than 15 minutes from start to finish and for under $30!


Saturday, July 14, 2012

Must run faster

I got back into running several months ago after a hiatus that started in late 2009 when we found out I was pregnant.   I tried to start running again several times after I had her but I'm one of those unlucky women who had excess joint laxity until my hormones started to stabilize.   Then I was in grad school and life was just too insane for me to do anything.  

I've never been a natural runner.  I swam and rowed crew in high school, and rowed for a year in college. I had to run for crew and absolutely loathed it.   There are several reasons why I didn't really enjoy running very much:
1) I'm slow.
2) I'm fat.
3) Did I mention I'm slow?

I ran the Rentschler Airfield 5K on Thursday evening.  It was 90 degrees and humid with blazing sun for the first half of the race.   That's less than ideal, especially considering that I did all of my running on a treadmill at the air conditioned YMCA.   I hadn't run on the road since, um, 2009.

Things weren't atrocious.  I went out and hit the first mile at around a 10 minute pace (my planned race pace was 11 minute miles).   Then the sun/heat really hit on the second mile and I was around a 12:30 pace, and then I finished the 5K in 37:34 - a 12:06 average pace for the entire 3.1 mile distance.   Not great but also not awful.  I wasn't the slowest and I wasn't the slowest in my age group, either.  For the last half of the race I was pretty much surrounded by other people including some folks who looked like much more serious runners - and we were all suffering with the heat.

A few things I've learned:

1) I need new shoes, badly.  My New Balance 769s from 2009 are breaking down and no longer give me the support I need to run comfortably.   Like I said, I'm no lightweight and I also tend to pronate - not a great combo on old shoes because it causes shin pain.
2) I need to start running outside now and then.  This is really hard for me to do because of Mark's work schedule; he's not home until 7:15 and because of Lily I can't leave until he's here.  I think I can swing one outside run per week with the others on the treadmill at the Y.
3) I need to improve my speed.  I have the Jeff Galloway 5K app because I like how it adjusts the BPM of my music to suit my pace, and it has a program to improve one's time.   I'm going to start it in hopes of getting faster.
4) I need to figure out what to do with my iPhone.  I first tried it in the zipper pocket of my SparkleTech skirt but the buttons got touched and messed up my program.   I ended up holding it for the rest of the race which was annoying.   Maybe one of those armband things will work?

I addressed #1 today when I took Lily to Fleet Feet for a fitting.   My last several pairs of shoes have been New Balance, but we decided to switch to Nike.   I went for the Zoom Structure Triax+ 15.   I ran on their treadmill with 6+ pairs of shoes and these were by far the most comfortable.  I also picked up a pair of Balega socks.  Going for a fitting with a toddler was a whole new experience which included my kid knocking over a display of Camelbak bottles - so embarrassing.   She was pretty patient for a 2 year old, though.

I'm a sucker for punishment because I signed up for another 5K next Wednesday.  I know I can do the distance and I get a tech shirt for being one of the first 500 to register, so why not?  It's in the town where my parents live, so Lily will hang out with Grandma at the finish line.   I hope to run faster this time or at least have a more even pace - we'll see.    After this one, I have a 5K scheduled for late August and another in mid-October.   Mark and I have signed up for the Warrior Dash in September so I need to start some strength training to get ready for that.


Saturday, July 7, 2012

Toddler-friendly dining room chair cushions

Materials and Tools for 5 chairs
  • 3.5 yards of 45" home decor fabric in the stripe pattern
  • 1 yard of 54" clear 12 mil vinyl
  • Five 22"x24"x2" chair pads of high density urethane foam
  • Staple gun
  • Staples
  • Scissors
  • Philips head screwdriver
  • Needle nose pliers
Our dining room set has been in my family for 20+ years.   My dad got the set from a restaurant that went out of business and when I was a kid it was our dining set.   As my brother and I got older our parents got a nice new dining set and put the old one in the basement.   When I finished college and started to plan my first apartment, I got most of my furniture from my parents including the dining set.   My dad helped me strip and refinish it and then reupholster the tired and dated cushions on the chairs.   I chose a sage green microfiber fabric which served us well until last summer.


We transitioned Lily from her high chair to a booster right around a year old and immediately discovered what kind of a mess a small child can make while eating.   We put a cheap towel between the chair cushion and her booster and washed it once or twice a week, but it still got pretty nasty with spilled food and drink - not a classy look by any stretch of the imagination.


I recently sewed new valences for our dining room windows and decided to re-upholster our chairs to match.   I would have just covered over the existing fabric but over 9 years of use the foam is tired and not so springy anymore.   I also decided to bite the bullet and cover the upholstery on one of the chairs with clear vinyl.   Yeah, it looks kind of like an old lady's clear slipcovers, but with a young child my primary concern is making our everyday life easier, not having perfect aesthetics.  

The first step was to remove a cushion from the chair in order to measure for the fabric purchase.  The cushion is held on with screws from underneath.  My cushions have a thin fabric layer which was stapled over the support webbing.  The staples can be pulled with needle nose pliers.  I set aside this layer to use again (we're on a budget here, campers).    I just measured around with a tape measure and jotted down the dimensions of the fabric; in this case 24"x25".   Measure the fabric that's already on your cushions - there's  no need to reinvent the wheel here. 


Time for math!   The home decor fabric that we chose for the valences is a 45" width and we have 5 chairs.   24" x 5 = 120" = 3 1/3 yards of fabric.   I rounded up to 3.5 yards to be on the safe side, but unfortunately there will be quite a bit left over since I can only get one piece out of the width of fabric.   The 12 mil clear vinyl is a 54" wide, so one yard will be enough to comfortably cover a cushion and have enough left over in case we need to rework it   Your numbers may vary from mine.   If you're buying your foam-by-the-yard, keep doing the math to figure out how much foam you need; foam seems to come in a 24" width so for my cushions I would have bought 3.5 yards of foam-by-the-yard.

The valences use two fabrics and I considered covering two chairs in the solid blue and three in the stripe.


However this particular home dec fabric is $10.99/yard at regular price, so I really wanted to get all the fabric in one cut in order to use a 40% off coupon on it (I only had one coupon).  The stripe also lets me pick up coordinating table linens in the different stripe shades rather than just the solid blue.  

OK, back to the project.   We already removed the cushion and took off the thin material to measure for fabric.  Now it's time to pry off the staples for the upholstery fabric.   The support webbing on the seat base is what actually supports the weight of the person sitting on the chair.  The webbing was in good shape on all but one of our chairs and for that chair I just pulled the staples out, pulled the webbing taut, and re-stapled.   You want to try to get one piece of the old upholstery fabric off intact to use as a template for the others.   Once I got the first piece off, I used a utility knife to cut the fabric on the others and that made the process go much faster than trying to yank all those staples out.   Underneath the fabric there were layers of 1" high density foam, thin batting, and the seat base itself.


The first step of reupholstering is to trim down the chair pad to fit.  I decided to do away with separate 1" foam and batting and just go with a thicker 2" high density foam.   Use the old foam or padding as a template - just trace around and use scissors to cut to the correct shape and size.   


The second step is to cut the fabric and vinyl (if you're using it).  Again, keep it simple and use the existing fabric as your template.


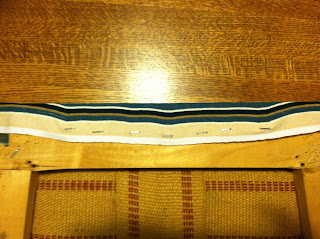
Then we start stapling.  I found it was best to get one side anchored, then pull the fabric taut across and anchor the opposite side.  Use staples liberally; I place them every 1.5-2 inches along the full length or width.  


At corners you're going to need to ease the fabric a bit.  This is really the only fiddly part of the whole process.  It was not unlike making hospital corners on a bed or wrapping a gift - you tuck and anchor so that the fabric is even.


Finally I re-stapled that thin black cover fabric over to hide the pad and webbing and give the cushion a neat appearance.   I screwed the cushion back onto the chair and it was done!  


For Lily's chair I did the exact same thing but then covered with the vinyl piece.  It was more challenging to work with vinyl because it doesn't stretch. I covered the cushion in two layers, first stapling the striped fabric and then independently stapling the vinyl - this way if we ever want to remove or need to replace the vinyl we can do it without disrupting the fabric underneath.  The vinyl is a little wrinkly but it works.  I'm hoping that by the time we're past the stage of having young kids we'll be able to buy a new dining set!   

This was an inexpensive and easy way to update our dining room - and the use of the vinyl makes cleanup after Lily so much easier.  


Monday, July 2, 2012

Working the curb appeal

To kick off the 2012 Staycation, Mark and I took advantage of his Mondays off of work to install concrete edgers along the wooded/planted area of our backyard.   We had installed plastic hammer-in edging around 2 years ago but it just didn't hold up well and soil erosion covered it over in places so we felt that we needed something sturdier and taller.

We started by marking off where we wanted the edge to go and digging a trench around 4" deep.  Thanks to our awesome rocky soil, there was a lot of rock removal and cutting through tree roots.


We dug out the trench on Sunday during Lily's nap, finishing right before it rained.   The rest waited for Monday after the kiddo was dropped off at daycare.  

We chose a 12" long "Tuscan" style edger from Home Depot.  They had a similar style at Lowes but were 18" and we thought the shorter block would make it easier to work around the curve.   We bought 60 edgers because we thought we needed that many (I paced out the distance).   We also got 5 bags of paver sand based on the guidelines in the chart on the bag of sand.   It was good that we went to Home Depot (much closer to home) because my little crossover was almost bottomed out on the shocks from the weight of around 800 pounds of concrete and sand.  


After digging the trench we put 1" of paver sand into the bottom and compacted and leveled it using a length of 2x4.  


Then we started setting the edgers into the sand.  It was a really quick process to fill the trench and set the pavers.


Bella provided moral support.


Then we backfilled with the dirt we dug out of the trench as well as some topsoil that we picked up at Agway.   Mark fertilized and seeded and we set the sprinkler to run for 20 minutes twice a day.


They turned out great!    We have edgers left over to take to the back of the yard at a later date (we have a bunch of brush back there from when a tree came down in the yard during last year's freak October snowstorm.


Sunday, July 1, 2012

A DIY/home improvement staycation

And I have so freaking much to do!   It's tough to get big household projects done on Saturdays when Mark's at work and I'm flying solo with Lily - I'm limited to what I can accomplish during a 2 hour nap!   We've been trying to reserve Sundays for family fun since it's the only day each week where all three of us are home together.   Starting in just a few weeks we have birthday parties every single weekend for three weeks in a row, culminating in Lily's birthday party in early August.   Did I mention that we're hosting her birthday party at our house and therefore all of this shit actually has to get done soon?

Sunday
Caulk trim in bathrooms
Remove miniblinds from bathroom windows, fill holes from hardware
Mask trim in bathrooms
Touch up paint in dining room
Mark out where edgers will go in backyard
Cut out fabric for Lily's dress

Monday (Mark's day off)
Dig trench for edgers in backyard
Buy edgers
Lay edgers and backfill
Put down grass seed and set up sprinkler w/ automatic timer
Remove ivy from the roof of the shed

Tuesday
Fix outlet box in upstairs bathroom, install GFCI
Prime windows and trim in bathrooms
Purchase materials for dining chair reupholstering (where the hell are my Joann Fabrics coupons?!?)
Sew dress for the kiddo

Wednesday
Family fun at home

Thursday
Top coat #1 on windows and trim in bathrooms
Mulch planting beds around the deck
Organize/purge linen and bathroom closets
Order party supplies for Lily's birthday
Sew short/top outfit for the kiddo, skirt for me

Friday
Top coat #2 on windows and trim in bathrooms
Install white window latches on bathroom windows, re-hang doors
Install door latch on Lily's bedroom closet
Drive to IKEA, buy picture ledge and frames
Clean out filing cabinets

Saturday
Hang picture ledge and frames in living room
Install privacy film on bathroom windows
Move filing cabinets to basement
Move Lily's play kitchen into family room